This page is not intended to be a technical presentation It is a look at working with NZ type porcelain on a day to day basis as a potter.. If you want a deeper technical knowledge start with these sources:
https://digitalfire.com/glossary/porcelain
https://digitalfire.com/article/formulating+a+porcelain
https://digitalfire.com/material/2145
Most of us have no desire to make our own porcelain or to know all the intricate chemistry and physics of making and firing.
We just want to buy a porcelain clay and use it with some degree of success.
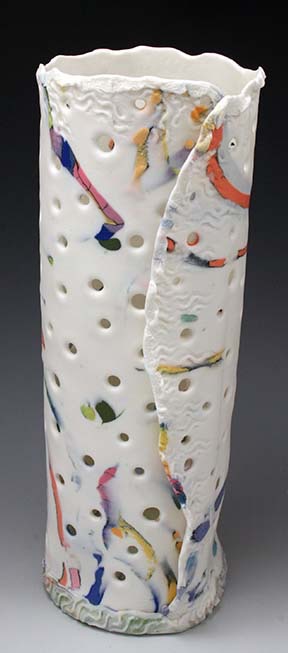
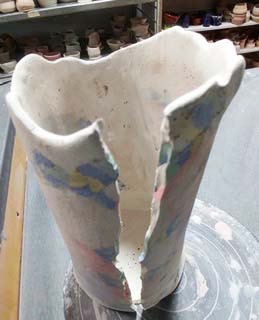
We want this ….. NOT this
Is that really asking too much?
Yes, it is if … you are expecting your NZ halloysite porcelain to act like the Grolleg porcelain, porcelain mixes or stoneware clays you learned on. There is a learning curve. You need to pay attention to every step of the process from forming to firing.
The biggest advantages of halloysite clays are the whiteness and the translucence.
If you are not looking for translucence or brilliant whites stick with another white clay body. There is no sense in dealing with this if another clay body will work for what you are doing.
Today clay companies are formulating ‘porcelaneous’ bodies that are not true porcelains but very lovely. They take the best of porcelain and add to it so it is easier to use. It won’t be a brilliant white but your colors will still be lovely and you might be a lot happier.
THE DIVA
Porcelain does have a well deserved reputation for beauty. Also a reputation for being finicky to work with. When porcelain wares are well executed, they can take your breath away. But sometimes when you are working with it … you lose your breath in a whole different way.
Why did porcelain get the reputation for being so precious?
Its a long story which is told very well in the two books I recommended but basically the Chinese discovered it and for a few hundred years, it was the best kept secret in the world. Only Emperors, Royalty and the super wealthy could afford to buy it. They flaunted it like jewelry and built rooms in their homes dedicated to showcasing their trove.
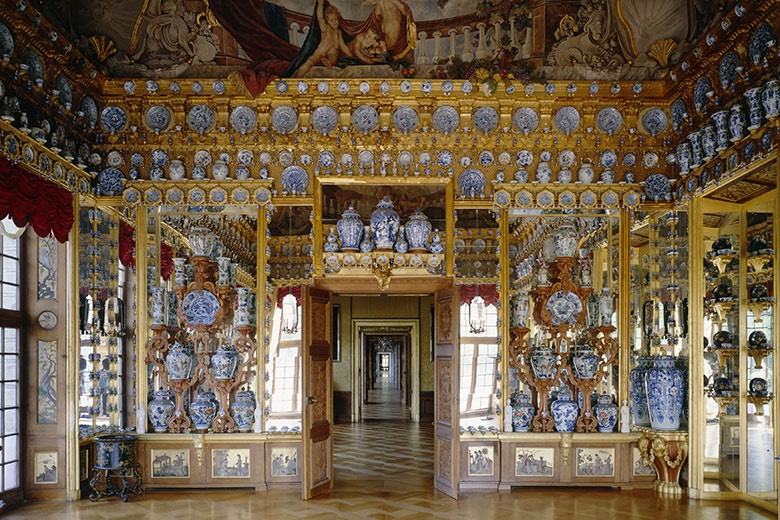
So of course everyone wanted the recipe. They tried to duplicate it or fake it. Huge sums of money were spent, alchemists were held prisoner in search of this. One potter almost melted his home trying to fire it. It has a very exciting history that explains why it holds its place at the top of the clay world.
There are many different types of porcelain.
In North America the most common bag of porcelain is likely a Grolleg Porcelain … made with English Grolleg Kaolin. Many clay companies have formulations for Cone 5-6 and for Cone 10. They have formulated these bodies to give you a flexible clay body. Some are recommended for throwing, others for hand building and special mixes for slip casting.
Most of the porcelain lessons you’ve had were probably taught using this type of body. I used to teach with it because you could rush the work in a week long workshop with very few problems. It is not as easy to work with as a groggy stonewear body but easier than the New Zealand kaolin clays.
New Zealand Kaolins are famously the whitest. They too are formulated for firing at Cone 5-6 and also to Cone 10. They do not behave like Grolleg bodies.
They have a tubular composition so they absorb and discharge water differently. They are short clays, are sticky to work with and dry differently. You have to give yourself time to learn how to use it.
The upside is that it is brilliant white, softly translucent, produces amazing color and feels wonderful to the touch. The downside is they are very unforgiving. You have to slow down every step of the process and pay attention to the clay.
My current teaching clay body is ‘Frost’ by Laguna Clay. I came to it from ‘Southern Ice’ which is notoriously fussy so I thought it was fairly easy to use. I soon found that if you did not go through the ‘SI’ learning curve, it was not a lot of fun. I do not have any personal experience with other NZ clays so cannot speak to them.
SLOW DOWN !!
Slow down every step of the process. You cannot successfully work with this clay in a hurry. Maybe in a few years when you get to know it better, but not at the start.
What do I mean by slow down?
I was fortunate to visit the studio of Kayo O’Young
as he was preparing for a major show. The entire studio was covered with large white pots drying on every flat surface and in a dry box. I asked how long his work would be drying and he said about a month minimum. It hit me then that this is what "slow down" means. It’s not about the time I think it should take, it’s about how long the clay needs to dry.
Really, what is the hurry?
Yes, potters who use earthenware and stoneware are zooming through the day. They make things and set them on shelves to dry then fire them and voila … in a week they have finished pieces.
They can do this because the clay bodies have materials & grog added to help support the clay and assist with shrinkage and breeze through firings. I am not saying it is easy, but it is faster.
A question I am often asked is “ How can you produce a lot of work if it takes this long?" Well, the answer is … I don’t just sit around and watch it dry. I make work every day so the process is in motion always. It may be a longer cycle but it is still a productive one.
AGAIN … I will say that if you are not after translucence or amazing whiteness, consider using an easier, smooth white clay body that fires to at least Cone 5. Most clay suppliers have information and images on their websites to help you choose a clay that will work well for what you want to do.
WATCH YOUR HUMIDITY
At a molecular level this clay is tubular, not flat platelets. It takes on and emits water differently. At every part of the process pay attention to keeping your clay evenly moist. This is something you have to pay attention to every day as your climate changes constantly. One day nothing dries and the next day you cannot keep anything moist. It is not static.
I put a piece of plastic down, then lay a damp towel on it and plastic over the towel. Any time I am not actively working with a piece it is on the towel under plastic. Because of where I live I can seldom leave a piece out.
In my experience the NZ type clay bodies dry out quickly when left out so I am never without my damp towels and rags.
That said the clay itself feels sticky. This does not bother me but some people do not like it at all. This stickiness gets even worse if you spray water directly on the clay. Keep your work surface and towel wet, not the clay.
It is also what is called a ‘short’ clay. It will not twist easily and when bent it often shows signs of cracking. You can work with this, I do all the time … but you have to expect it and plan your forms around it.
When you roll out this clay you need to give it time to shrink back a bit before you try to make a form with it. It makes sense to let this happen before the pressure of shrinking rips your form apart. So give it time. It is usually only a matter of half an hour or less … try an experiment in your own studio. Measure your slab after rolling, then again in 15 minutes and again at 30 minutes. That will tell you how long you generally need to wait.
All parts of your form need to be at the same humidity level or you will get cracks. If you are going to add handles, base or feet they need to match if you want success.
This clay wants/needs to dry evenly. You have to provide an environment where the whole object can achieve the same level of moisture throughout the drying process. Drafts and direct sunlight … even through a window … can throw off even drying.
https://digitalfire.com/article/drying+ceramics+without+cracks
When you high fire it, use the controlled cooling profile of your kiln. Controlled cooling or ‘firing down’ will eliminate 50% of your cracking during firing issues. Modern electric kilns cool much too quickly, especially at the top and bottom. Even when controlling the cooling I always put my important pieces towards the center of the kiln.
IT IS GOING TO MESS WITH YOU!
Yes, it will.
If you do not give it your full attention, even moisture and very slow, even drying … it will crack.
If you get it too wet it will likely collapse.
If you make canes with it and don’t give the whole cane time to even out in moisture … they will crack.
If you roll it out and don’t give it time to relax and shrink back a bit before using … it will crack.
If you try to attach pieces that are not at the same moisture level … it will crack.
If you try to dry it without covering it and keeping it out of drafts and sunshine … it will crack.
If you try to rush the drying … it will crack.
Fire it without controlled cooling … it will want to crack.
AGAIN … I will say that if you are not after translucence consider using an easier, smooth white clay body that fires to at least Cone 5. There is nothing wrong with sparing yourself the frustration.
However, the rewards of using these porcelains are HUGE so consider slowing down and learning how to use it. Clay is not a race or a contest so give yourself the gift of time. Enjoy the process. Learn from your mistakes. Enjoy your victories wherever you can grab them.
